Hello Friends! In my previous two blog posts (Working on Announcements in Dynamics 365 & Announcements using PowerApps) I walked you through about working on announcements using web-resource or by creating PowerApps control in Dynamics 365.
Today we'll see broadcasting announcements in Unified Service Desk. Before getting started I assume you have basic knowledge of what is USD, what are hosted controls, action calls, events, toolbar, etc. in USD.
Let's get started..
Step 1: Create a hosted control to show announcements in Unified Service Desk.

Step 2: Create Actions to navigate to Announcements.
As I have created two controls for announcements one is using html web-resource and another using PowerApps, here I'll create two actions either to navigate to web-resource or to PowerApps.
Actions which I am going to create will be associated with hosted control for announcements which I've created in Step 1. Navigate action for web-resource contains the url of html web-resource which I've created in this post.

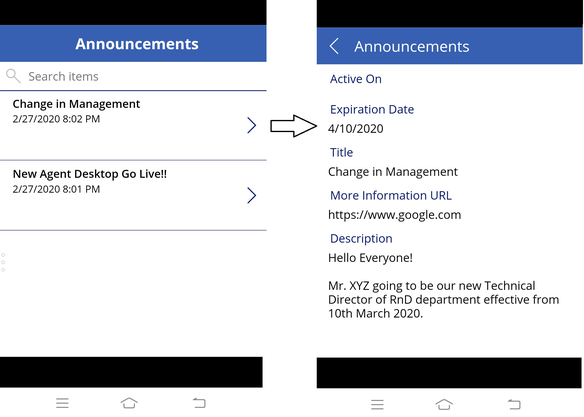
Navigate action for PowerApps control contains the url of canvas app which I've created in this post.

Step 3: Trigger the navigate action for PowerApps as a default control when USD desktop loads.
To display the announcements when USD loads we need to add the action to the DesktopReady event of CRM Global Manager.


Today we'll see broadcasting announcements in Unified Service Desk. Before getting started I assume you have basic knowledge of what is USD, what are hosted controls, action calls, events, toolbar, etc. in USD.
Let's get started..
Step 1: Create a hosted control to show announcements in Unified Service Desk.
- Component Type : Standard Web Application
- Hosting Type : Chrome Process
- Application is Global : Yes
- Display Group : RightPanel
Step 2: Create Actions to navigate to Announcements.
As I have created two controls for announcements one is using html web-resource and another using PowerApps, here I'll create two actions either to navigate to web-resource or to PowerApps.
Actions which I am going to create will be associated with hosted control for announcements which I've created in Step 1. Navigate action for web-resource contains the url of html web-resource which I've created in this post.
Step 3: Trigger the navigate action for PowerApps as a default control when USD desktop loads.
To display the announcements when USD loads we need to add the action to the DesktopReady event of CRM Global Manager.
We are ready to go and test our changes in USD, but I have created 2 different actions for 2 different controls (web-resource and PowerApps) so I'll add navigation buttons on About Toolbar of USD to navigate to any of the control.
Steps:
- Create Announcements Toolbar button
- Add Announcement Toolbar Button on About Toolbar.
- Add actions for navigation and expanding Right Panel on USD.
- Create two toolbar buttons
- Create PowerApps Control Toolbar button and add actions for navigation & expanding Right Panel to it.
- Create Web Control Toolbar button and add actions for navigation & expanding Right Panel to it.
- Associate this toolbar buttons to Announcements Toolbar button.
Finally, it's time to test our changes in USD. Let's see how to renders on Unified Service Desk.
Hope you understand the steps, feel free to connect me if you need any help.
Happy Learning..!